
 The holidays are coming up soon, and it is that time of the year to start putting up the Christmas decorations.
 A fun activity around our house is being creative and making our own decorations, instead of purchasing the store bought ones.
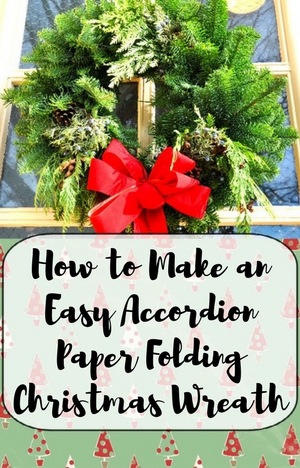
One of the essential holiday decorations to have is a nice wreath to put on your doors and windows.
This tutorial video will show you how to make an easy accordion paper folding Christmas wreath at home. Do this craft activity at home with your family, and use such wreath to add to your collection of DIY Christmas decorations.
Supplies Needed
Mini Hot Temperature Melting Glue Gun KitColored A4 Origami Folding Craft Paper
Pencil
Scissors
Glue
Ruler
Cardboard Circle
Step by Step Instructions
The Wreath:1) Take one sheet of green origami paper and apply glue on one edge all the way down the side. Then take another sheet, and place along this glued side to combine.
2) Place the cardboard circle directly in the middle of the two glued pieces of paper, and trace the inside and outside of the circle.
3) Sketch two other concentric circles about another inch larger and smaller than the circle you traced in step #2.
4) Cut out the larger circle along the line you sketched. Then puncture hole in the middle, cut to the smaller, inside circle you sketched, and cut out this inside circle.
5) Apply glue on one side of the cardboard circle, and smear with your finger to cover the entire surface.
6) Place the circle glue side down within the circle boundary you traced in step 2.
7) Cut about ½ inch cuts in the excess paper along the inside and outside of the cardboard circle.
8) Apply glue on the face up side of the cardboard circle, and smear with your finer to cover the entire surface.
9) Fold each of these ½ inch cuts up to stick to this glued side of the cardboard circle.
10) With another sheet of green origami paper, measure a strip of 24 cm. x 3 cm. and cut out. (Note: you can then you this strip as a template to cut out multiple strips of paper with the same measurements).
11) Fold one of the strips of paper in half, then fold each end to meet this middle fold, then fold each end again to meet these quarter folds, and lastly fold each end of the strip to meet the quarter fold of the other end of the strip.
12) Fold these strips over and under on the creases in an accordion shape.
13) Repeat steps 10 - 12 with multiple strips of green and light green paper.
14) With your hot glue gun, apply a little line of glue on the paper ring, and place the end flaps down on the glue so they are touching (with a little excess hanging over the sides).
15) Then where the two flaps come together, apply a little more hot glue along this line, and stick the flat part of the accordion strip down.
16) Apply the remaining strips of you folded (2 green strips for every 1 light green strip) all the way around the circle.
The Bow:
1) With a red sheet of paper measure a rectangle of 20 cm. x 16 cm. and cut out.
2) Fold this square in half in a triangle shape, corner to corner.
3) Repeat with the opposite two corners of the square.
4) Fold the square in half in a rectangle shape, flat edge to flat edge.
5) Repeat with the opposite flat edge side.
6) Fold the creases down around the middle point of the paper into a smaller square shape.
7) With one of the corners, make a small corner fold over and under.
8) Open the square up completely (you will see the creases of a small square in the middle).
9) With this small square in the middle, fold each of the sides down along the edges of this smaller middle square.
10) Push two side of the square in along the creases, so they are touching, and fold flat.
11) With the flat edge at the top, fold a long tab along the two sides in an arrow shape, flip over, and repeat on the other side.
12) Open the paper up, and push the small popped up square in the middle down flat.
13) Flip over again, with the middle square side down.
14) Cut along the edges of these folded tabs (4 cuts), then fold one side over to the other.
15) Fold the other two sides inward in half to align in the center.
16) Cut a center line along the folded piece in step 14 (but not all the way to the end).
17) Fold the corner sides of this cut piece inward, in an L shape on both sides.
18) Fold the bottom corner side, back over this L shape fold in the previous step.
19) Make a triangle shaped cut on the bottom ends.
20 ) Fold the two shaped corners inward, and underneath the center square.
21) Apply hot glue to the back, and place on the wreath to complete.
By following the easy steps in this tutorial, your Christmas paper wreath will be ready to show off. I have a few placed inside our house, and have already received plenty of compliments on them. Start making these beautiful wreaths for the holiday season, and give a unique look to your home!